You can know every new products be published here, and witness our growth and innovation.
Date:03-09-2026
The installation of epoxy resin through-wall bushings is a precise and strictly regulated electrical operation, mainly divided into two scenarios: pre-embedded (installed simultaneously during wall construction) and post-embedded (installed after the wall is formed). The following are the general installation steps and key points based on industry standards (such as GB 50149-2010, DL/T 5221-2016).
I. General Installation Steps
1. Pre-installation Preparation
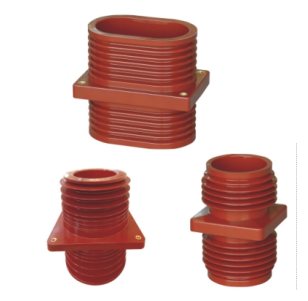
Parameter verification: Confirm that the rated voltage, current, and creepage distance of the bushing are consistent with the design drawings, and check for any cracks or damages on the appearance.
Measurement and positioning: Use a laser level or chalk line to mark the centerline of the wall to ensure the accuracy of the hole position and avoid stress on the busbar or cable when forced through later.
Hole processing: The hole diameter is usually 5-10mm larger than the outer diameter of the bushing to allow for adjustment and filling of sealing materials. The edge of the hole should be smoothed and burrs removed to prevent damage to the cable or bushing surface.
2. Bushing Fitting Fixation and Sealing
Fixation Method: For epoxy resin bushing with metal flanges (such as aluminum alloy flanges), expansion bolts or chemical anchors are typically used to fix the flanges on both sides of the wall. The recommended fixation interval is ≤ 300mm to ensure the bushing does not loosen during operation vibration.
Sealing Filling: This is a crucial step for waterproofing, fireproofing, and rodent prevention.
Gap Filling: The annular gap between the bushing and the wall should be filled with fireproof putty or fireproof sealant, with a recommended thickness of ≥ 20mm to ensure a dense and gap-free seal.
Waterproof Treatment: For outdoor wall penetration or in damp environments, the outer end of the bushing should be inclined downward at 15° – 30°, and a waterproof cover should be installed to prevent rainwater from flowing back.
3. Conductor Insertion and Connection
Insertion Protection: Before inserting busbars or cables, check if the inner wall of the bushing is smooth. For cables, it is recommended to put on a protective tube (such as a corrugated tube) on the insertion section to prevent sharp edges from scratching the insulation layer.
Connection Tightening: When connecting the terminal, the bolts should be tightened to the standard torque to avoid local heating due to poor contact. After connection, check if the sealing ring is intact to prevent moisture from entering.
4. Post-installation Testing
Insulation Test: After installation, the insulation resistance must be tested with a 2500V megohmmeter. The qualified value is usually ≥1000MΩ (or in accordance with specific standards).
Withstand Voltage Test: For high-voltage bushings (such as 10kV and above), a power frequency withstand voltage test should be conducted (e.g., 10kV bushing subjected to 42kV/5min without breakdown).
II. Core Precautions
No Hard Knocking: Although epoxy resin has high strength, its impact resistance is not as good as that of metal. During installation, it is strictly forbidden to directly strike the bushing body with a hammer or other hard objects to prevent micro-cracks in the internal insulation layer, which could lead to partial discharge.
Moisture Prevention and Cleaning: Before installation, wipe the inner and outer surfaces of the bushing with anhydrous alcohol to ensure there is no dust or oil. When working in humid weather, take moisture-proof measures to prevent condensation from affecting insulation performance.
Allowance for Expansion and Contraction: For environments with expansion joints or large temperature differences, a 10-15mm allowance for expansion and contraction should be reserved between the bushing and the conductor, or a rubber compensator should be installed to prevent deformation of the bushing due to thermal expansion and contraction.
Grounding Requirements: If the bushing has a metal shield or metal flange, it must be reliably grounded, and the grounding resistance should be ≤4Ω to eliminate induced voltage.
III. Special Scene Handling
Embedded Installation: Before pouring the concrete wall, the bushing needs to be embedded in place. At this time, special attention should be paid to the positioning accuracy to prevent the bushing from moving during the pouring process. Both ends of the bushing should protrude from the wall by more than 50mm to facilitate the sealing treatment in the later stage.
Outdoor Installation: Outdoor type bushings usually have anti-pollution flashover skirts. During installation, pay attention to the direction of the skirts (usually downward), and regularly clean the dirt on the skirts to prevent flashover due to dust accumulation.
Safety Tips: Installation work must be carried out in a de-energized state, and a “Do Not Close” warning sign should be hung. The installation of high-voltage bushings is recommended to be operated by qualified professional electricians.


Address:No.27, Binhai South 3 road, Yueqing Economic Development Zone, Wenzhou City,Zhejiang Province,China.